Bearded Iris Project List2021
Every garden should include Bearded Irises, they are dramatic yet easy to maintain perennials.
Here are your supplies and tips you’ll need for the best results.
![]() Root Stimulator— A healthy root system is the key to your new plant’s success! A brief, 1-2 hour soak in a weak solution of root stimulator will help rehydrate rhizomes just before planting. Water well with solution after planting.
Root Stimulator— A healthy root system is the key to your new plant’s success! A brief, 1-2 hour soak in a weak solution of root stimulator will help rehydrate rhizomes just before planting. Water well with solution after planting.
![]() Compost— Organic compost loosens heavy clay soils and helps make nutrients available. Amend existing soil before planting rhizomes.
Compost— Organic compost loosens heavy clay soils and helps make nutrients available. Amend existing soil before planting rhizomes.
![]() Expanded Shale— A porous, lightweight gravel that increases drainage and aeration. As well as helps to break up native clay soils, which is especially important for bearded irises.
Expanded Shale— A porous, lightweight gravel that increases drainage and aeration. As well as helps to break up native clay soils, which is especially important for bearded irises.
![]() Mulch— Retains moisture and helps regulate soil temperature. Mulch only lightly around bearded irises; be cautious to not crowd the stems or leaves with mulch as this can cause rot.
Mulch— Retains moisture and helps regulate soil temperature. Mulch only lightly around bearded irises; be cautious to not crowd the stems or leaves with mulch as this can cause rot.
Glossary of some common bearded iris terms:
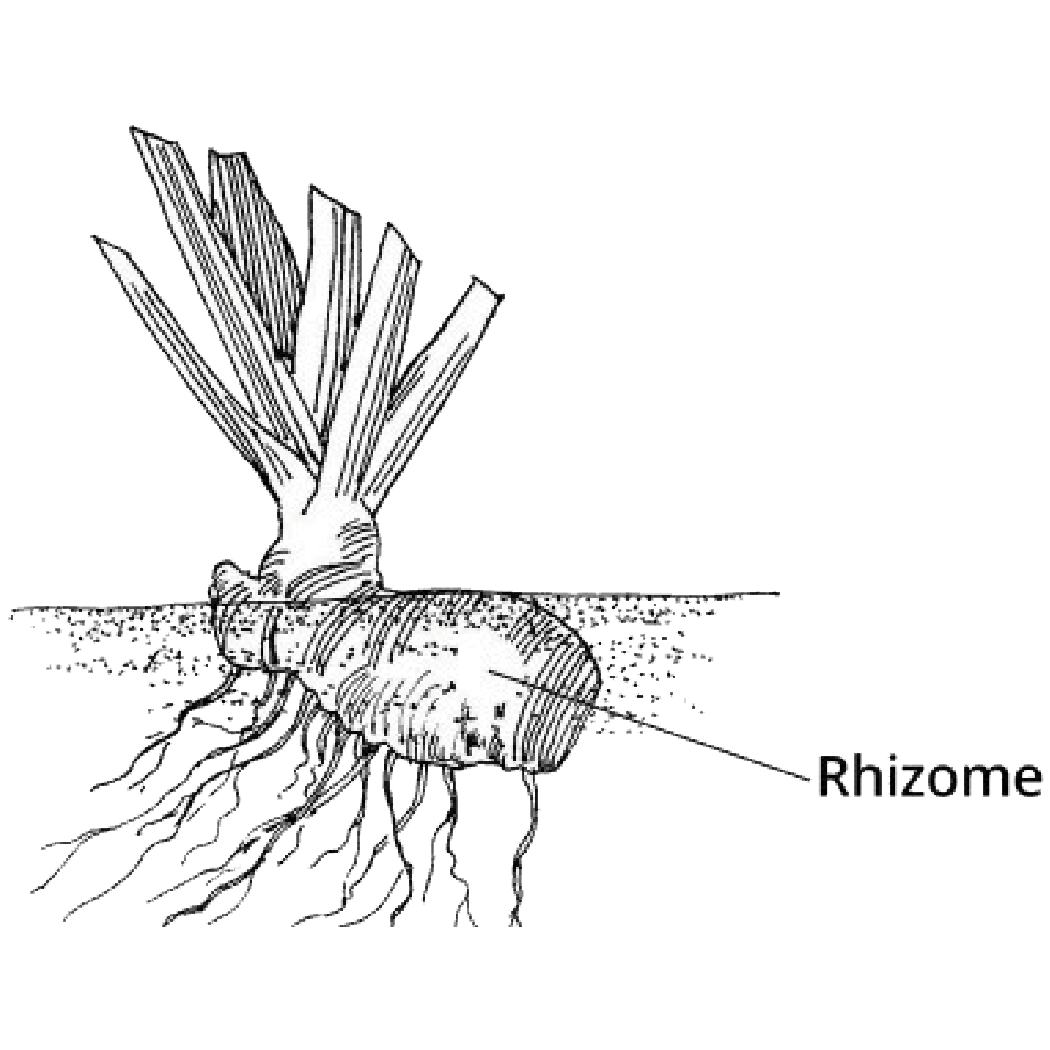
- Rhizome: A fleshy, underground stem from which leaves and roots grow.
- Standards: The upright three petals of a bearded iris bloom.
- Falls: The lower three petals of a bearded iris bloom.
- Beard: Fuzzy attachment at the base of each fall petal.
- Rebloom: An iris that blooms in any other season other than the normal spring bloom.
- Fan: The shape created by iris foliage when trimmed back, noted during division.
- Dividing/Division: The separation of multiple rhizomes from a clump of rhizomes that have been growing together for several years. Usually done in late summer to encourage repeated bloom.
Follow these simple steps to enjoy years of garden beauty:
SITE: Bearded irises bloom best in full sun (minimum of 6 direct hours) although they will grow in part shade as well (with fewer blooms). Tall bearded irises can reach 36” or more in bloom, so they’re ideal for planting in the middle of perennial borders and beds as a backdrop for shorter blooming perennials and annuals.
PREP: Dig the soil to a depth of 10” and add compost and expanded shale to break up heavy clay, improve drainage and add organic matter. It is not necessary to add fertilizer now.
PLANT: You may choose to give the rhizomes a brief soak (1-2 hours) in water or a weak solution of water and root stimulator to hydrate them before planting. This is not necessary, but some iris enthusiasts advocate it. Once they dry, you may also wish to give them a light dusting of sulfur as an extra guard against rot.
-
- Space rhizomes 8”-12” apart. Ideally, plant groups of 3 of the same variety in a triangle pattern for greater color impact.
- Plant rhizomes very shallow—about 1” deep, where the top of the rhizome is just covered with soil and any foliage is above soil level. If the rhizome has roots attached, spread these out while planting. Water rhizomes well after planting with a solution of root stimulator to encourage establishment.

- Water rhizomes well after planting with a solution of root stimulator to encourage establishment.
FERTILIZE & MAINTAIN: You may lightly mulch your irises in fall and late spring to help regulate soil temperatures. Apply a balanced granular fertilizer around rhizomes in early spring before bloom and again about a month after bloom. After bloom in spring, remove spent blooms and stalks. Plan to divide clumps of rhizomes every 3-4 years, depending on density, to encourage continuous bloom. See a Garden Advisor for more help to be the most successful with bearded irises.
Become a Grow Member today and every dollar purchased by GrowCard customers, at a regular price, earns a reward point. Every 200 points earns a $10 reward voucher that can be redeemed any time during the Reward Season. (Reward points do not accrue on already discounted purchases, and reward points expire at the end of each season)

